Pocas mensajes de error son tan universalmente frustrantes —o tan ampliamente malinterpretados— como el error CRC de registro en una placa hash de Antminer. Aparece en los registros del kernel de toda la línea S19 y S21, provoca caídas de hashrate y picos de error de HW, y en muchos talleres de reparación se etiqueta erróneamente como "fallo aleatorio de chip" cuando la verdadera causa raíz es algo mucho más específico.
Esta guía desglosa qué son realmente los errores CRC de registro, por qué ocurren en las plataformas Antminer y los procedimientos de diagnóstico y reparación paso a paso que restauran las placas hash afectadas a su pleno funcionamiento.
Qué es realmente un error CRC de registro
CRC significa "Cyclic Redundancy Check" (Verificación de Redundancia Cíclica), un mecanismo de integridad de datos de bajo nivel utilizado en todos los protocolos de comunicación digital. En una placa hash de Antminer, el firmware realiza continuamente verificaciones CRC de los datos devueltos por cada chip ASIC en la cadena. Cuando los datos devueltos no coinciden con la suma de verificación esperada, el minero registra un "error CRC de registro" contra ese chip o dominio.
Lo crucial a entender: un error CRC de registro no es la enfermedad. Es un síntoma. Te dice que algo está interfiriendo con la comunicación limpia de datos entre la placa de control y uno o más chips. El trabajo del técnico de reparación es encontrar qué.
Los datos de un especialista en reparación de ASIC con más de 13.000 reparaciones de placas hash completadas son inequívocos en este punto: los errores CRC de registro son casi siempre relacionados con el hardware. Los reflashes de firmware, los reinicios y los cambios de configuración del pool pueden ocasionalmente enmascarar el síntoma, pero no solucionan la falla subyacente. La intervención a nivel de componente es lo que resuelve el problema a largo plazo.
Las cuatro causas raíz de los errores CRC de registro
1. Inestabilidad del dominio de voltaje
Las placas hash de Antminer organizan sus chips ASIC en dominios de voltaje, grupos de chips que comparten un riel de alimentación regulado. Cuando el regulador de un dominio falla, envejece o experimenta una mayor resistencia en su ruta de entrega de energía, los chips en ese dominio reciben un voltaje inestable. Los chips que funcionan con un voltaje fuera de especificaciones se comportan erráticamente, y el comportamiento errático produce errores CRC.
Los culpables comunes dentro de un dominio de voltaje: CI convertidores buck fallidos, condensadores electrolíticos envejecidos que han perdido capacitancia y malas soldaduras en las trazas de energía que han desarrollado resistencia debido al ciclo térmico.
2. Pérdida de sincronización de PLL
Cada chip ASIC contiene un Bucle de Enganche de Fase (PLL) que sincroniza el reloj interno del chip con la señal de reloj de la placa hash. Cuando el PLL de un chip pierde el bloqueo, ya sea por degradación interna del chip o por condiciones de operación adversas como un sobrecalentamiento prolongado, el chip funciona desincronizado con el resto de la cadena. Los datos desincronizados producen retornos con desfase que no pasan la verificación CRC.
La pérdida de PLL es particularmente común en placas que han experimentado repetidos apagados térmicos o que funcionan en instalaciones con una refrigeración deficiente. Es uno de los indicadores más fiables de un chip que se acerca al final de su vida útil.
3. Chips ASIC fallidos o moribundos
Los chips ASIC no siempre fallan limpiamente. Un chip parcialmente fallido aún puede responder a comandos, pero devolver datos incorrectos o ilegibles. En un chip sano, el hashrate por chip en los registros de prueba debería ser de alrededor de 5000. Un chip que devuelve ~1092 u otros valores drásticamente reducidos es casi con seguridad la fuente de un error CRC y necesita ser reemplazado.
La degradación del chip se acelera por el ciclo térmico, los eventos de sobretensión y el funcionamiento prolongado por encima de las temperaturas de unión nominales.
4. Juntas de soldadura defectuosas
Esta es la causa más subestimada. Los chips ASIC en las placas hash de Antminer se montan con BGA; sus bolas de soldadura se encuentran debajo del encapsulado del chip, invisibles desde arriba. Una junta de soldadura que parece perfecta a simple vista puede estar agrietada, soldada en frío o no conectada en absoluto. Los técnicos de reparación informan con frecuencia de casos en los que los pines parecían correctamente soldados desde el lateral, solo para descubrir al retirar el chip que esos pines nunca habían formado una conexión en primer lugar.
Las malas uniones de soldadura suelen manifestarse después del estrés del ciclo térmico: la placa funciona bien cuando está fría, pero desarrolla errores CRC una vez que los chips se calientan y los micromovimientos rompen las conexiones marginales.
Diagnóstico de un error CRC: el camino eficiente
Resolver los errores de CRC manualmente con un multímetro y un osciloscopio es posible, pero lento. El enfoque eficiente utiliza un probador ASIC dedicado para aislar la falla en minutos.
Paso 1: Identificar la placa afectada y la posición del chip. Lee el registro del kernel para determinar qué placa hash está generando el error y si está localizado en un número de chip específico o si abarca varios chips. Si el error está localizado en un rango estrecho, ese rango generalmente corresponde a un solo dominio de voltaje, lo que apunta a una falla del chip o a un fallo en la entrega de energía en ese dominio.
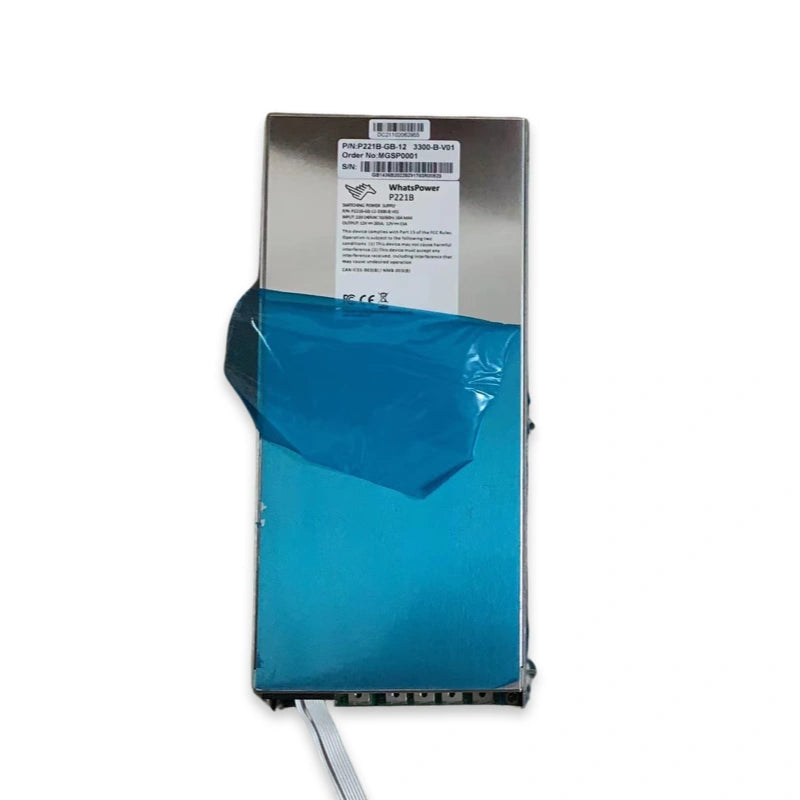
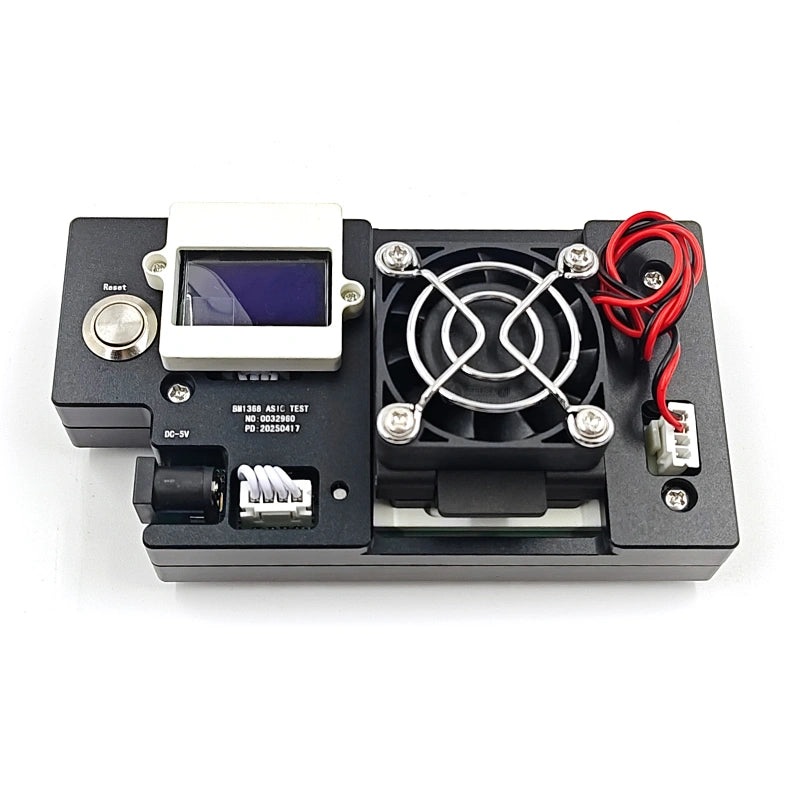
Paso 2: Pruebe la placa sospechosa en banco. Retire la placa hash del minero y conéctela a un probador de diagnóstico. Un K9 ASIC Multifunctional Tester es compatible con más de 70 modelos de máquinas de minería, incluidas las líneas completas S19 y S21, y escaneará la placa chip por chip, informando la posición exacta de cualquier chip defectuoso junto con datos de diagnóstico sobre el voltaje y el hashrate por chip. Esto convierte horas de conjeturas en minutos de diagnóstico dirigido.
Paso 3 — Verifique el componente defectuoso antes de reemplazarlo. Para las placas de la plataforma S21, un BM1368 Series ASIC Chip Tester dedicado puede verificar si el chip en sí está defectuoso antes de retirarlo. Para las placas S19 XP y S19K Pro, el equivalente es el BM1366 Series ASIC Chip Tester. Estos probadores también le permiten verificar los chips de reemplazo antes de la instalación, lo cual es fundamental si está adquiriendo chips del mercado de segunda mano.
El contexto de reparación S19 vs. S21
Las diferentes variantes de S19 y S21 utilizan chips ASIC diferentes, y el suministro del reemplazo correcto es importante:
- Antminer S19 / S19 Pro / S19j: Chips de la serie BM1397 (TSMC FinFET, ~30 J/T de eficiencia)
- Antminer S19j Pro: Serie BM1362 (especialmente el BM1362AC)
- Antminer S19 XP / S19K Pro: Serie BM1366 (BM1366BS, BM1366BP)
- Antminer S21 / S21 Pro / S21 XP / T21 / S21 Hydro: Serie BM1368 (BM1368AA, BM1368PA, BM1368PB, BM1368PM, BM1368PV)
Más allá de la diferencia en la familia de chips, la plataforma S21 introduce un cambio arquitectónico significativo con respecto a la S19: el BM1368 elimina los circuitos MOS y PIC presentes en los chips Antminer anteriores, y añade 11 amplificadores operacionales desde el segundo dominio de voltaje en adelante para la suma de señales. En la práctica, esto significa que el diagnóstico de CRC en una placa S21 a veces requiere verificar los circuitos de amplificadores operacionales en la posición de transferencia de 2 dominios, un paso de diagnóstico que no se aplica a las placas S19.
Flujo de trabajo de reparación: del registro de errores a la placa en funcionamiento
Una vez que el diagnóstico ha aislado la falla en un chip o componente de energía específico, el flujo de trabajo de reparación sigue un patrón consistente:
1. Reflujo antes del reemplazo. Para problemas de soldadura marginal, el reflujo del chip sospechoso es la solución más económica. Aplique fundente alrededor del chip, caliente cada junta de soldadura hasta que se disuelva con una estación de aire caliente y permita que el estaño vuelva a fluir para hacer un contacto limpio con la almohadilla. Si el error desaparece después del reflujo, el problema estaba relacionado con la soldadura y el chip en sí todavía está bien.
2. Reemplazo del chip si el reflujo falla. Si el error CRC persiste después del reflujo, el chip en sí está defectuoso y necesita ser retirado. Use una estación de aire caliente para levantar el chip, limpie las almohadillas e instale un nuevo chip usando una plantilla de plantación de estaño para asegurar la formación consistente de las bolas de soldadura. Siempre verifique el chip de reemplazo con un probador de chips dedicado antes de soldar; los chips nuevos defectuosos son un riesgo real al obtenerlos del mercado de segunda mano.
3. Sustitución de componentes del dominio de voltaje. Si el diagnóstico apunta a un fallo en el suministro de energía en lugar de un fallo del chip, reemplace el convertidor buck, los condensadores u otros componentes de energía sospechosos en el dominio afectado. Vuelva a probar la placa bajo carga antes de ponerla en servicio.
4. Nueva prueba completa de la placa. Después de cualquier reparación, pruebe la placa en banco a través de un ciclo completo de hashrate. Los errores CRC que solo aparecen bajo carga térmica no se mostrarán en una prueba en frío; haga funcionar la placa el tiempo suficiente para que todos los chips alcancen la temperatura de funcionamiento normal antes de declarar que la reparación está completa.
Cuando la reparación no es viable
No todas las placas con errores CRC merecen ser reparadas. Una placa con varios chips defectuosos en diferentes dominios de voltaje, corrosión extensa o daños en la PCB base suele estar más allá de una reparación económica; el costo de las piezas y la mano de obra se acerca o excede el valor de una placa de reemplazo. En esos casos, recolectar componentes aprovechables (chips buenos, disipadores de calor, conectores) y reemplazar la placa por completo es la decisión correcta.
Para todo lo demás, la combinación de las herramientas de diagnóstico adecuadas y los chips de reemplazo de calidad convierte lo que parece una placa hash muerta en un día de trabajo y una máquina restaurada.
Obtenga las piezas y herramientas adecuadas
Disponemos de chips ASIC de las series BM1368, BM1366, BM1397 y BM1362, probadores de chips dedicados para cada plataforma, probadores universales de placas hash y toda la gama de herramientas necesarias para el diagnóstico y la reparación de errores CRC, con precios directos de fábrica desde Shenzhen y envío DDP a EE. UU.
→ Explorar accesorios de prueba de placa hash ASIC y probadores de chips
¿Necesita ayuda para identificar el chip o probador adecuado para su modelo específico de Antminer? Nuestro equipo técnico puede hacer coincidir las piezas correctas con su hardware. Contáctenos en contact@lys-sz.com o vía WhatsApp.