Last reviewed: May 2026 — covers Antminer S21, S21 Pro, S21 XP, S21+, S21 Hydro, S21+ Hydro and S21 XP Hydro.
The Antminer S21 family is the workhorse of the 2024–2026 mining fleet. Higher chip count, denser hashboards and tighter thermal envelopes than the S19 generation mean the thermal interface between ASIC chips and the heatsink (or the water-cooling plate, on Hydro units) is no longer a place where shortcuts go unnoticed. A misapplied thermal paste layer is the single most common cause of post-repair hash-rate decay we see come back to the bench — and almost all of it is preventable with the right thermal interface material (TIM), the right stencil for the specific model, and a clean, repeatable bench procedure.
This guide walks through the full thermal-paste-and-stencil workflow for the entire S21 family, including the often-overlooked Hydro variants. It covers TIM selection, a model-by-model compatibility matrix, step-by-step procedures for both air-cooled and Hydro units, and the failure modes we keep seeing on rework benches in Shenzhen.
Why Thermal Paste Matters More on S21-Generation Hashboards
Every generation of ASIC has pushed per-chip heat density higher. The BM1368 and BM1370 chip families that ship in the S21 series concentrate more compute and more switching loss into the same footprint as the BM1397/BM1398 generations that preceded them, while the heatsinks and water plates have not grown in surface area at the same rate. That puts the burden on the thermal interface — the thin layer of paste or gel between the chip top and the cooling surface — to move heat more efficiently than it ever had to on an S19 or earlier.
Two consequences follow. First, the conductivity of the TIM stops being optional: a 4 W/mK grease that worked fine on a quiet S19 will leave an S21 chip running noticeably hotter, eating into hash-rate headroom and accelerating component ageing. Second, the application of that TIM — how evenly it sits, how full the joint is, how clean the chip tops are before it goes down — becomes far more important. A 0.1 mm bubble or a missed chip on an S19 was an inconvenience; on an S21 hashboard, it is a thermal throttling event waiting to trigger.
The Three Failure Modes That Age 5–6 W/mK Paste
Cheaper 5–6 W/mK thermal pastes fail predictably in production. They age out via three mechanisms:
- Pump-out: repeated thermal cycling — every miner shutdown and restart, every load swing — physically squeezes paste out from between the chip and the heatsink. Over months, the joint thins, air gaps appear, and the chip gets hotter.
- Dry-out: the lighter-fraction carriers in a paste evaporate over time, especially under sustained high temperatures. The paste cures, hardens, and loses the wet contact that makes it work.
- Migration: on vertical hashboards or hashboards exposed to vibration, paste can creep off the chip top, sometimes onto neighbouring components. The chip ends up uncovered.
An 8 W/mK silicone-based gel resists all three. The single-component silicone base has very low pump-out under cycling, does not dry out within the typical 12-month operating window, and stays put on the chip top without migration. As documented on our 8 W/mK blue silicone thermal gel listing, swapping a 5–6 W/mK paste for an 8 W/mK gel on a typical S21-series hashboard delivers roughly 3–6 °C lower chip junction temperatures at full hash — enough headroom to change whether a unit throttles or holds spec under warm-ambient conditions.
Choosing the Right TIM for Your S21
There is no single "best" TIM, but there is a defensible default. For the dense S21 hashboards — and especially for any Hydro variant where the chip-to-water-plate joint is the entire cooling path — an 8 W/mK silicone gel is the modern baseline. Lower conductivities have a place on lighter ASIC generations or on bench-test rebuilds where the unit will not see sustained production duty, but for production hashboards the 8 W/mK class is what consistently holds temperatures.
4, 5 and 8 W/mK — When Each Is Appropriate
- 4 W/mK (white grease — Whatsminer KL1040 reference): legacy general-purpose grease used historically on Whatsminer M-series and lower-density boards. Available as KL1040 1kg white grease. Acceptable for older S19/M-series rebuilds and for cosmetic/touch-up work, but undersized for an S21 production rebuild.
- 5 W/mK (G18 hashboard paste): the most common "middle of the road" choice for ASIC hashboards. Stocked as G18 5 W/mK hashboard thermal paste, 1kg. Workable on S21 air-cooled units running cool ambients, but will pump-out and dry-out faster than an 8 W/mK gel under heavy duty.
-
8 W/mK (G19 / DOWSIL TC-3080 / China-made silicone gels): the production recommendation for S21 series, especially Hydro. Choose between:
- China-made 8 W/mK blue silicone gel, 1kg — factory-direct, identical single-component silicone formulation as imported brands at a lower cost per pail.
- DOWSIL TC-3080 8 W/mK blue gel, 1kg — imported brand reference for shops that prefer a named-supplier specification.
- G19 8 W/mK blue gel, 1kg — production-volume pack tailored for S21 hashboards.
- G19 8 W/mK blue gel, 110g — small pack for low-volume repair benches or first-time evaluation.
Whichever TIM you settle on, pair the pail with a proper dispenser. A 30cc thermal gel gun loaded from the 1kg pail gives the cleanest, most repeatable bead onto a stencil — far more consistent than scooping with a spatula, and dramatically faster on a production bench rebuilding fleets.
Why a Dedicated Stencil per S21 Model — Not a Universal One
This is the single most-asked question on our support channel from repair shops moving from S19 to S21 work: "Can I just use a generic stencil?" The honest answer is no, and the reason matters.
Each S21 sub-model has a different chip layout, a different number of chips on the hashboard, and a different heatsink (or water-plate) contact footprint. The air-cooled S21 and the S21 Hydro do not share the same chip pattern. The S21+ Hydro and the S21 XP Hydro have different chip-and-water-plate geometries again. A stencil that registers correctly on one will misalign on another — apertures land between chips instead of over them, grease deposits end up on components that should stay clean, coat thickness becomes inconsistent.
The downstream cost of a misaligned stencil is exactly the failure chain you spent the rebuild trying to fix: uneven coat → air bubbles in the joint → reduced heat conduction → higher chip temperatures → hash-rate decay or thermal shutdown. A 1:1 stencil that matches the chip-and-heatsink positions for the specific model eliminates the whole chain in one tool choice.
Compatibility Matrix — Which Tool for Which S21
| Miner Model | Cooling | Dedicated Tool from Our Catalog |
|---|---|---|
| Antminer S21 | Air | S21 Silicone Grease Application Tin Tool (combo grease/tin tool) |
| Antminer S21 Pro | Air | S21 Pro Thermal Paste Mold – Precision Grease Application Tool |
| Antminer S21 XP | Air | S21 XP Hashboard Thermal Grease Mold (3-piece plastic stencil) |
| Antminer S21+ | Air | S21+ (Plus) Thermal Grease Steel Mesh Stencil (3-layer, L+R / BOT / Full Kit variants) |
| Antminer S21 Hydro | Hydro | S21 Hydro Thermal Grease Fixture & sister S21 Hydro Silicone Grease Fixture |
| Antminer S21+ Hydro | Hydro | S21+ Hydro Thermal Grease Stencil (stainless steel + black positioning frame) |
| Antminer S21 XP Hydro | Hydro | S21 XP Hydro Silicone Grease Stencil (stainless steel, 1:1 chip-and-heatsink positions) |
| Antminer S21 Pro Hydro | Hydro | Not currently stocked under a dedicated S21 Pro Hydro slug — sourced on request |
If you operate the S21 Pro Hydro and need the matching grease stencil — the one row in the matrix still showing as sourced on request — send us the miner serial and ideally a photo of the hashboard with chip layout visible at contact@lys-sz.com, and we will route the right tool from our Shenzhen network without forcing you to compromise on a near-fit. As a related reference, the S19 XP+ Hydro thermal paste stencil is the sister-generation tool we ship most for the S19 fleet still in production.
Step-by-Step — Air-Cooled S21 Family (S21 / S21 Pro / S21 XP / S21+)
Air-cooled S21 units share the same general bench procedure. The geometry varies by sub-model — which is why the stencil choice matters — but the steps and the discipline are identical.
Tools and Consumables Checklist
- The correct stencil for your specific S21 sub-model (or the S21 silicone grease application tin tool for the base S21 air-cooled)
- An 8 W/mK silicone thermal gel (G19, China-made or DOWSIL TC-3080) — sized to your batch volume; 1kg covers roughly 40–60 hashboard rebuilds when stencil-applied
- A 30cc thermal gel gun for clean dispense
- Isopropanol (90%+) and lint-free wipes
- A flat plastic or stainless steel squeegee scraper
- A torque driver matched to the Bitmain service spec for your model (do not improvise the torque value — see "Common Mistakes" below)
- Optional but recommended: a universal hashboard test fixture for post-rebuild verification before the board goes back into the miner
Disassembly and Cleaning
Power off the miner and disconnect from mains. Remove the hashboard from the chassis per the standard Bitmain service procedure. Set the board flat on an ESD-safe mat, chip-tops up. Using isopropanol and a lint-free wipe, strip the existing thermal compound from every chip top and from the matching heatsink contact area. The chip surface must look clean and dry before the new TIM goes down — any residue from the old paste compromises the contact of the new joint. Inspect the chip tops under good lighting for any solder splash, debris or damage; flag any chips that need replacement before reassembly.
Stencil Registration and Paste Dispense
Lower the stencil onto the hashboard so the apertures register cleanly with the chip array — every aperture sitting fully over its chip, no offset, no rotation. Dispense your gel directly onto the stencil with the gel gun, covering the chip array generously enough that a single squeegee pass will fill every aperture. Pull the squeegee in one steady, continuous motion across the stencil. Do not lift mid-pull; do not pass twice. The goal is a flat, even coat thickness controlled by the stencil's aperture depth.
Heatsink Fit, Torque Sequence, Clamp Check
Lift the stencil straight up off the board — never slide it sideways, which will smear the deposits. Inspect each chip top: every chip should have a clean, full bead of gel with no gaps and no smearing onto adjacent components. Lower the heatsink straight down onto the chip array (again, never slide) and clamp at the torque specified by Bitmain for your specific model. Tighten in the manufacturer's recommended sequence — usually a cross-pattern progressive torque — and verify the final clamp pressure on each fastener.
Reassembly and First-Boot Thermal Check
Refit the hashboard into the chassis. On first boot, monitor chip temperatures via the miner UI or your fleet management tool. A correctly rebuilt S21 hashboard should reach a steady-state thermal profile within minutes, with chip temperatures uniformly distributed across the board (no outlier chips running 5–10 °C hotter than their neighbours). An outlier almost always points to a stencil misalignment, a missed chip, or paste contamination on that chip — worth pulling the board for re-inspection rather than letting it cook in production.
Step-by-Step — Hydro S21 Family (S21 Hydro / S21+ Hydro / S21 XP Hydro)
Hydro units share the air-cooled discipline but add two non-negotiable steps: depressurise the coolant loop before disassembly, and leak-check before re-energising. Skipping either has consequences that go beyond a bad thermal joint.
Coolant Loop Depressurisation — Non-Negotiable
Power off the miner. Follow the Bitmain Hydro service procedure to depressurise the coolant loop before any disassembly of the cooling plate. Working a pressurised loop is unsafe and risks coolant contamination of the hashboard. Drain or relieve pressure per the service spec, then proceed.
Hashboard Extraction and Water-Plate Stripping
Remove the hashboard with its water-cooling plate from the chassis. Separate the water plate from the hashboard. Strip the existing thermal compound from both the chip tops and the water-plate contact surface — both sides of the joint need to be clean and dry. The water plate's polished contact surface is critical to heat transfer; do not abrade or scratch it during cleaning. The S21 Hydro water-cooling heatsink plate is a precision part — treat it like an optical surface.
Hydro-Specific Stencil Registration and Paste Dispense
Use the stencil that matches your specific Hydro model from the compatibility matrix above. Index the stencil's positioning frame (on the S21+ Hydro and S21 XP Hydro stencils) so it cannot shift during the pull — this is the single biggest time-saver on a busy Hydro bench, and the reason a positioning-frame stencil produces consistent results even with junior technicians on the line. Dispense gel, pull the squeegee in one steady motion, lift the stencil straight up.
Water-Plate Re-Fit, Leak Check, Repressurisation
Lower the water plate straight down onto the chip array — once again, no sliding — and clamp at the Bitmain service torque for the specific Hydro model. Reconnect the coolant lines. Repressurise the loop per the service spec and perform a leak check before re-energising. Any drop in pressure, any visible coolant at a connector, any seep — stop, fix, retest. The cost of a leaky cooling loop on a powered hashboard is not measured in dollars per minute, it is a board replacement.
First-Boot Diagnostics
On first boot, monitor delta-T across the hashboard and the hash rate ramp. A correctly rebuilt Hydro board should hold its target hash rate within a few percent of nameplate, with chip-to-chip temperature spread under a few degrees. A wider spread, an outlier chip, or a slow hash-rate ramp under load all point to a thermal joint issue worth re-inspecting before the unit goes back into production.
Common Mistakes — and How to Avoid Them
Using the Wrong Stencil for the Sub-Model
The most expensive mistake on an S21 bench. A S21+ Hydro stencil will not register correctly on a S21 XP Hydro hashboard — the chip-and-heatsink pattern is different. Apertures land between chips, grease ends up where it should not, the joint is uneven, and the unit comes back to the bench within months. Always confirm the stencil matches the exact miner sub-model before the first squeegee pull. The compatibility matrix above is the reference.
Smear Contamination on Neighbouring Components
Sliding the stencil off the board sideways instead of lifting it straight up smears gel onto resistors, capacitors and signal traces around the chip array. Beyond cosmetic, gel on signal pads is a long-term reliability hazard. Lift, never slide.
Overfilling — the "More Is Better" Trap
Manual application without a stencil tends to over-apply, on the theory that excess gel is better than too little. It is not. Excess gel oozes out under clamp pressure, contaminates adjacent components, and on Hydro units can bridge to the water-plate seals. A stencil-controlled coat is sized to fill the joint and no more.
Sliding the Heatsink (or Water Plate) Instead of Lowering Straight Down
Sliding the cooling surface into place pushes the freshly-applied gel out of position before the clamp ever engages. The bead intended for each chip ends up on the neighbour, or off the chip entirely. Lower straight down, clamp at torque, never slide.
Improvising the Torque Value
Bitmain publishes a service torque for each S21 sub-model. Improvising — usually over-tightening — crushes the joint, deforms the chip carrier, and on Hydro can fracture the water-plate seal. Use a torque driver set to the service spec for the specific model. If the spec is not available to you, contact Bitmain support before rebuild rather than guessing.
Frequently Asked Questions
How often should I replace the thermal paste on an Antminer S21?
On a production miner running 24/7, plan for a thermal interface refresh as part of any major hashboard service — every 12–18 months of continuous operation, or any time you see chip temperatures climbing without a corresponding ambient or load change. A unit that has been in service through a hot summer and is now running 3–5 °C warmer than the previous summer at the same hash rate is signalling pump-out or dry-out of the original paste.
Can I use the same stencil for the S21 Pro and the S21 XP?
No. The chip layout and heatsink footprint differ between S21 sub-models, and using a near-fit stencil leaves apertures misaligned with the chip array. Use the stencil dedicated to your exact sub-model, or contact us with the miner model and we will route the correct tool from our Shenzhen network.
Is 8 W/mK silicone gel really better than 5–6 W/mK thermal paste?
For production duty on an S21-generation hashboard, yes — both for thermal performance (roughly 3–6 °C lower chip junction temperature at full hash on our test rebuilds) and for longevity (resistance to pump-out, dry-out and migration over months in service). The cost delta per pail is small relative to the maintenance and downtime cost of a degraded joint.
What is the difference between thermal paste and thermal gel for ASIC hashboards?
"Paste" and "gel" are often used loosely, but the practical distinction is the carrier chemistry. Most 4–6 W/mK pastes use carriers that evaporate over time (dry-out). Silicone-based gels, including the 8 W/mK class we ship for S21, use a single-component silicone matrix that does not evaporate within the normal operating window and resists pump-out under cycling. For an S21 production hashboard, an 8 W/mK silicone gel is the right call.
Do I really need to depressurise the cooling loop on a Hydro unit before opening it?
Yes — without exception. A pressurised coolant loop opened on a bench will spill coolant onto the hashboard, into the chassis, and onto the technician. Coolant contamination of a hashboard is an expensive failure to clean up. Follow the Bitmain Hydro service procedure for depressurisation; budget the extra minutes.
Can I reuse a stainless steel stencil after multiple sessions?
Yes. The stencils we stock are designed for repeated use — wash off residual gel with isopropanol, dry flat, and store flat in a dust-free environment. Aperture geometry holds across many cycles as long as the stencil is not bent, scratched, or stored under load. The black positioning frame on the S21+ Hydro stencil is the part that wears first; spares can be sourced on request.
How much thermal gel do I need per hashboard, or per 1kg pail?
A 1kg pail of stencil-applied gel covers roughly 40–60 hashboard rebuilds, depending on chip count and stencil aperture depth. For a small repair bench doing one or two boards a week, a 110g small pack is enough for several months; for a production-scale farm rebuilding fleets, plan in pail-quantities.
What torque should I use when refitting the heatsink on an S21 hashboard?
Use the torque published by Bitmain in the service spec for your specific S21 sub-model — values differ between sub-models and between air-cooled and Hydro variants. We deliberately do not quote a single value in this guide because improvising torque is the source of more reliability issues than it solves. If you do not have the service spec for your model, contact Bitmain support or your distributor before rebuild.
Related Parts to Keep on Hand for an S21 Rebuild
A thermal paste refresh often happens at the same time as other hashboard service — chip replacement, water-plate inspection, post-rebuild bench validation. The parts and tools we ship most often alongside the stencils and gels above:
- BM1370BC ASIC chip — replacement chip for the S21 Pro / S21 XP / S21 Hydro chip family, useful when a thermal-paste refresh exposes a chip that needs swapping.
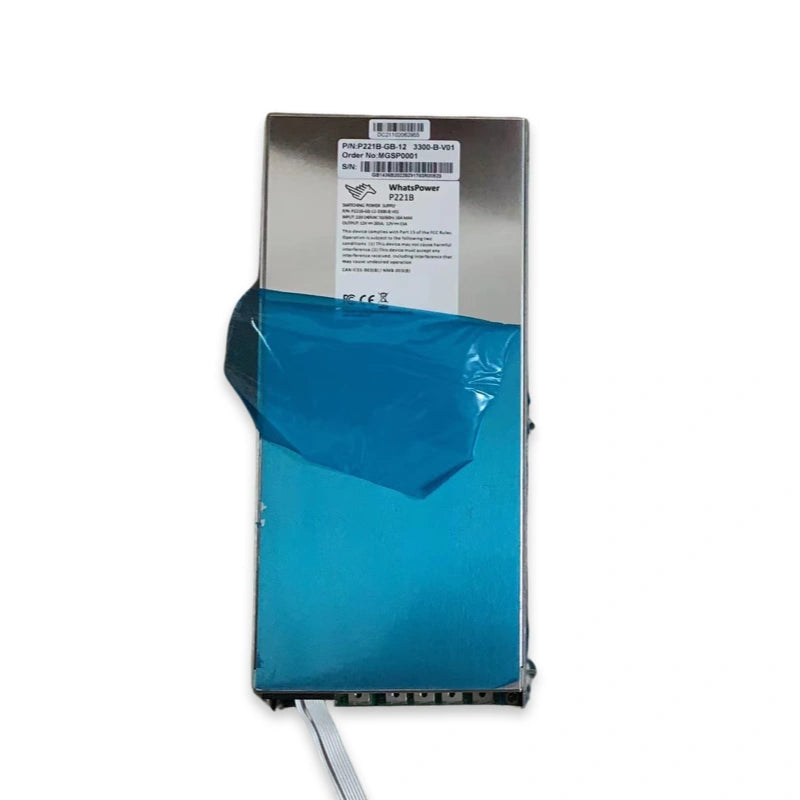
- S21 Hydro water-cooling heatsink plate — replacement plate when an existing one is scored, corroded by coolant residue, or otherwise compromised.
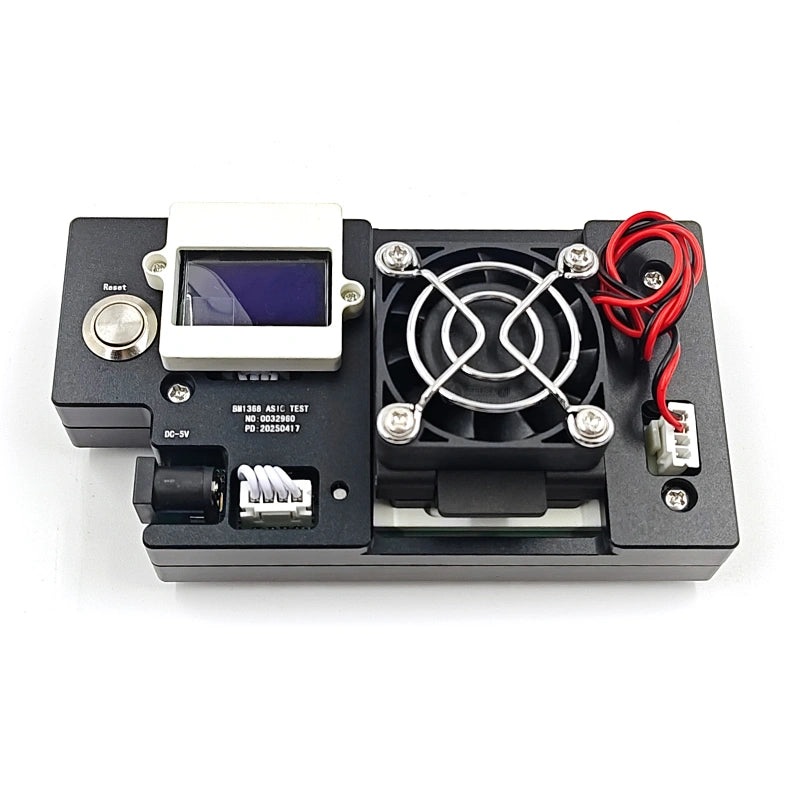
- Universal hashboard test fixture (S19 / S21 / Hydro / T21) — post-rebuild bench validation before the board goes back into the miner. Catches a bad thermal joint before it gets racked.
- 30cc thermal gel gun — the dispensing tool that turns a 1kg pail into clean, repeatable per-chip beads.
Refurbishing a fleet of S21-series miners and need stencils, gel and replacement parts shipped as a kit? Email contact@lys-sz.com with your miner model count and we will put a quote together — DDP shipping is available for USA & EU; the rest of the world ships from China with local customs on delivery.