Bitmain APW12 Power Supply Unit Repair Guide & Components List (2026 Update)
The Bitmain APW12 is the workhorse PSU of the Antminer S19 generation — powering the S19, S19j, S19j Pro, S19j Pro+, S19k Pro, S19 XP, and S19 Hydro families across every variant Bitmain shipped from 2020 to 2024. Built around a quasi-resonant flyback topology with the ICE2QR4765 controller and dual NCP1252/NCP1253A PWM stages, the APW12 ships in multiple sub-variants (APW121215, APW121417a, APW121417b) tuned to specific output voltage ranges. This guide covers the 16 most vulnerable components, the APW12-specific diagnostic workflow, and the full repair playbook with direct sourcing links — paired with our companion S19 hashboard repair guide, S19j Pro hashboard guide, and S19 XP hashboard guide for full-miner repair coverage on the S19 series.
Why APW12 PSU Repair Matters in 2026
The APW12 series powers the largest installed-base of Bitcoin mining capacity in operation today. Every Antminer S19-class miner — across the regular S19, the S19j Pro family, the S19k Pro, the S19 XP, and the S19 Hydro variants — runs on an APW12-family PSU. With the S19 fleet still profitable in low-cost-power environments post-halving, keeping APW12 PSUs alive is the single highest-leverage repair workflow for any farm operator. A full PSU replacement runs significantly more than the components needed for chip-level repair, and the APW12's quasi-resonant flyback topology is mature, well-documented, and recoverable from most common failure modes.
Compatible Antminer Models
The APW12 series powered the following Antminer models across the S19 generation:
- S19 family: S19, S19 Pro, S19a, S19a Pro
- S19j family: S19j, S19j Pro, S19j Pro+, S19j Pro Hydro
- S19k Pro: full series across all hashrate bins
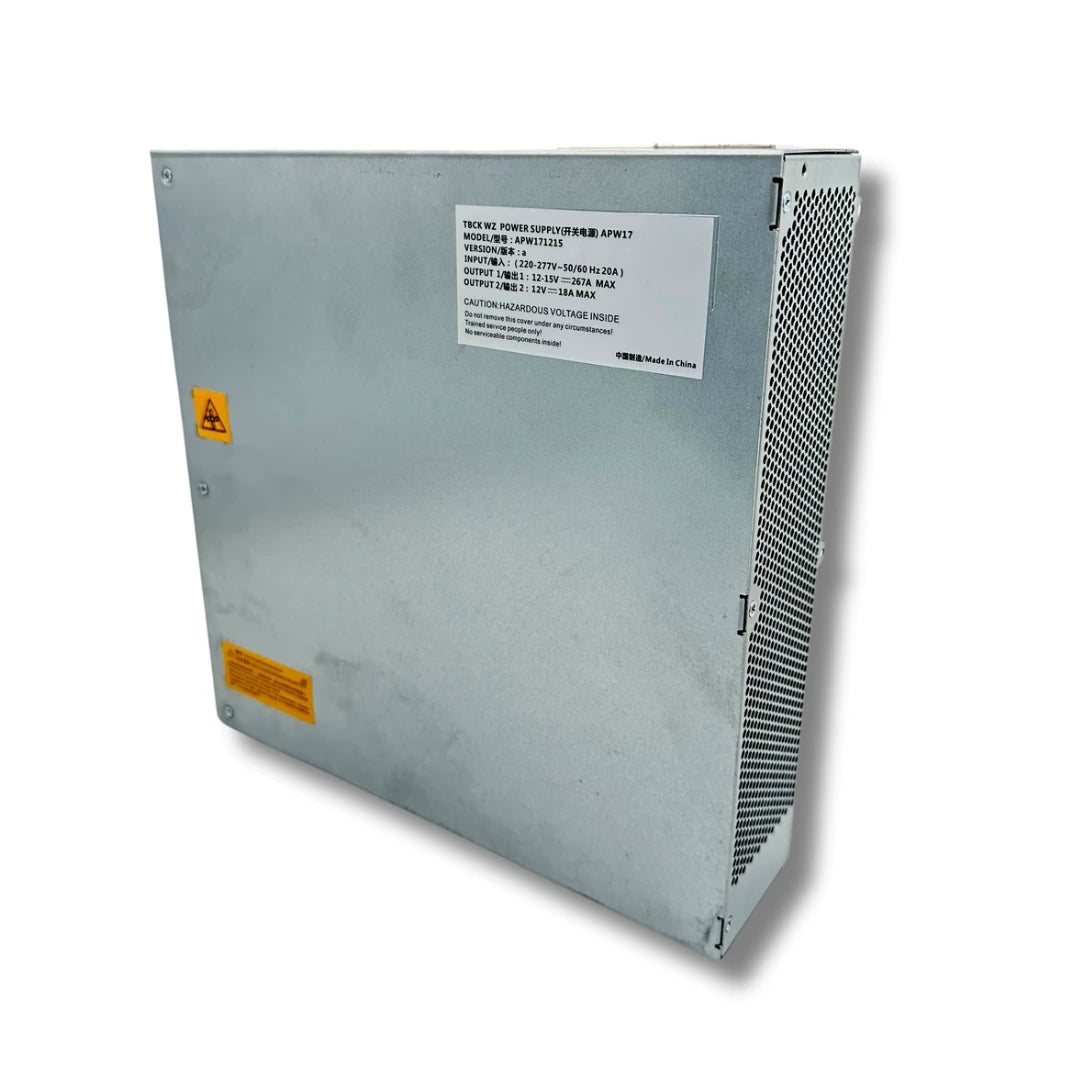
- S19 XP: S19 XP (specific APW17 variant for some XP units; APW12 for earlier production)
- S19 Hydro: HHB28601 hydro variants (APW9 / APW9+ / APW11 also compatible)
The APW12 family includes three commonly-encountered sub-variants:
- APW121215 / APW121215a: 12-15V DC output range — standard for most S19 / S19j / S19 Pro units
- APW121417a / APW121417b: 14-17V DC output range — used on higher-power S19j Pro+, S19k Pro, and select S19 XP units
The newer APW17 series powers S21 / S21 XP miners with a different topology; for the S21 family, see the upcoming APW17 repair guide. The Whatsminer P21 series serves a similar role on MicroBT miners — see our Whatsminer P21 PSU repair guide for the MicroBT equivalent.
APW12 PSU Architecture at a Glance
The APW12 is a dual-PFC quasi-resonant switching supply with digital monitoring and a separate standby rail. Key architectural elements:
- Input voltage range: 180-300V AC. The primary circuit consists of two independent PFC stages that require simultaneous power input to operate — both AC input lines must be fully connected for the PSU to start.
- Input stage: GBJ 2506 bridge rectifier (25A / 600V single-phase), 470µF 450V bulk capacitor for primary DC bus.
- Quasi-resonant PWM control: ICE2QR4765 quasi-resonant 650V offline controller forms the main switching engine for high-efficiency operation, downstream of the dual-PFC front end.
- Auxiliary PWM: NCP1253A (6-pin TSOP, current-mode flyback) and NCP1252 (8-pin DIP, current-mode for forward/flyback) handle the secondary stages and the standby supply.
- Primary switching: K39N50W5 (600V / 38.8A TO-247 N-channel MOSFET) and TPHR8504PL (40V N-channel) handle the main and secondary switching stages.
- Output rectification: SCS210AM 650V / 10A SiC diode (TO-220FM) and SBT20L100CT 20A / 100V Schottky rectifier (TO-220AB) handle secondary-side rectification with low Vf drop.
- Two output rails: a main rail (OUT1 / OUT2) at 12-15V (powered on via the IIC interface start switch — "I" position; under-load voltage typically 15V ±1%) and a standby (SB) rail at +12V ±5% with its own indicator light. The SB rail must come up first before the main rail can be activated.
- Output bulk: 1000µF 16V electrolytic capacitors handle output filtering.
- Isolation & control: TLP5772 logic-output optoisolator (push-pull, 6-SOP) bridges primary-secondary control. IX4340N dual low-side MOSFET driver (8-pin SOIC) handles gate drive on the secondary.
- Voltage reference: ZTL431BFTA adjustable shunt voltage reference (2.5V / 100mA, SOT-23-3) sets the output regulation point.
- Digital monitoring & IIC communication: PIC16F1704-I/SL 8-bit microcontroller handles host I²C / IIC communication, fault reporting, and basic supervision. The IIC interface accepts a remote power-on signal (low-level active) from the host control board — without this signal the main rail will not activate even when the SB rail is healthy.
- Small-signal support: MMBT3906 PNP (40V / 200mA, SOT-23) and DSS5540X PNP BJT (40V / 4A, SOT-89) handle protection-circuit and gate-drive support functions.
Most Common APW12 PSU Failure Modes — Mapped to Symptoms
The APW12 exposes 5 distinct fault symptom patterns that map to specific failure categories. Use this table as the first triage step:
| Symptom | Likely Cause | First Check |
|---|---|---|
| Fan not running, no output at OUT2 | Abnormal AC power supply | AC cord, both plug ends seated, grid voltage at the outlet |
| Fan working normally, but no output at OUT2 | AC input cable not fully connected | Both AC input lines fully connected (recall the dual-PFC architecture requires simultaneous power input) |
| OUT1 has no output | Output short or remote device not powered | Check load for short circuit, then verify the host control board is sending the IIC power-on signal (low-level active) |
| Power working intermittently | Overload, low input voltage, or over-temp protection | Verify load draw is within rated capacity, AC input within 180-300V spec, cooling fan operational, no dust accumulation blocking air ducts |
| Output normal but fan not running | Fan stalled or broken | Check for debris blocking blades, replace the fan if mechanically damaged |
Beyond the 5 symptom categories, the following component-level failure modes are common:
- "No output" with PSU fan spinning and AC LED green — first check the M6 copper-bar bolts on the hashboard-side output. Loose busbar bolts on Bitmain PSUs follow the same failure pattern as the Whatsminer P21: factory torque often ships below the 2.5-3.5 N-m spec range, and joints settle after thermal cycling. Always re-torque to 3.0 N-m before opening the PSU case.
- SB (standby) rail dead — no indicator light, no fan — failure causes include: open fuse, damaged SB control chip, damaged SB primary or secondary MOSFET (open or shorted), or open/damaged power supply diode. The SB rail must come up before the main rail can be activated.
- Hard short on primary switching — typically a failed K39N50W5 MOSFET. Test in diode mode before powering up — a healthy MOSFET shows 0.3-0.6V drop between drain and source.
- Quasi-resonant controller fault — failed ICE2QR4765 prevents the primary stage from oscillating; no switching means no transformer output.
- Output voltage out of spec — degraded ZTL431BFTA voltage reference drifts the regulation point.
- Secondary rectification failure — failed SBT20L100CT Schottky or SCS210AM diode produces low or unstable output voltage.
- IIC communication failure with control board — three common causes: the IIC cable is not conducting or the interface pin arrangement is incorrect, the MCU control chip program is incorrectly burned, or the PIC16F1704 MCU chip itself is damaged. Also check the TLP5772 optoisolator on the signalling path.
- Output voltage drops under load — degraded 1000µF 16V output capacitors no longer hold rail voltage during transient draw. Visual inspection for swollen tops or leaked electrolyte is the first check.
- Bulk capacitor failure / primary instability — degraded 470µF 450V bulk capacitor produces ripple on the primary DC rail.
- No main rail output despite healthy SB rail — usually one of: abnormal auxiliary power, functional protection triggered, abnormal PFC operation, abnormal PWM control system drive, damaged MCU chip or program error, damaged primary transistor, or damaged secondary transistor.
Critical Components — Function & Failure Behaviour
ICE2QR4765 Quasi-Resonant PWM Controller
The ICE2QR4765 is the heart of the APW12's primary stage — a quasi-resonant offline PWM controller rated for 650V operation. A failed ICE2QR4765 produces a PSU that powers on but generates no high-frequency switching. Verify the controller's VCC supply (from the auxiliary winding) before replacing.
NCP1252 and NCP1253A Current-Mode PWM Controllers
The NCP1252 (8-pin DIP, current-mode for forward and flyback) and NCP1253A (6-pin TSOP, 65kHz offline flyback) handle secondary PWM stages and standby supplies. Failures present as missing auxiliary rails or standby-mode faults.
K39N50W5 Primary MOSFET
The K39N50W5 (TK39N60W5) is the main 600V / 38.8A N-channel MOSFET in TO-247 package on the primary half-bridge. Test in diode mode: a healthy MOSFET shows 0.3-0.6V drop between drain and source. A shorted K39N50W5 is the most common cause of a blown AC fuse.
SCS210AM and SBT20L100CT Output Rectifiers
The SCS210AM (650V / 10A SiC diode, TO-220FM) handles high-voltage rectification, and the SBT20L100CT (20A / 100V low-Vf Schottky, TO-220AB) handles the main 12V output rectification. A failed output rectifier produces low or unstable output voltage on the 12V busbars.
Bridge Rectifier (GBJ 2506)
The GBJ 2506 25A / 600V single-phase bridge rectifier converts AC input to DC for the primary stage. Test all four diodes in diode mode (0.3-0.6V forward drop per junction). Open or shorted diodes = replace as a unit.
Bulk Capacitors
The 470µF 450V bulk capacitor (35×50mm) holds the primary-side DC bus voltage. A degraded or dried-out bulk cap produces ripple on the primary rail that the quasi-resonant controller cannot regulate out, leading to output instability under load. Visual inspection for swollen tops or leaked electrolyte is the first check. The 1000µF 16V capacitors handle output filtering on the secondary side.
Voltage Reference (ZTL431BFTA)
The ZTL431BFTA adjustable shunt voltage reference (2.5V / 100mA, SOT-23-3) sets the output regulation point through the feedback network. A degraded ZTL431BFTA causes the output voltage to drift out of spec — replace if the output is consistently high or low while the PSU is otherwise healthy.
Isolation and Gate Drive
The TLP5772 (logic-output optoisolator, push-pull, 6-SOP, CMTI-rated) bridges the primary-secondary control signal path. The IX4340N (dual low-side MOSFET driver, 8-pin SOIC) handles gate-drive support on the secondary stage. A failed isolator or gate driver produces either no switching at all or unsafe switching behaviour.
Digital Monitoring (PIC16F1704)
The PIC16F1704-I/SL microcontroller (8-bit, 7KB Flash, 3.3V / 5V, 14-pin) handles host I²C communication, fault code reporting, and basic supervision. This is the same PIC family used on Antminer hashboards, simplifying repair stock for full-miner inventories. A failed PIC blocks I²C communication between the PSU and the miner control board — the miner reports a "PSU not detected" or "communication failed" error code.
Small-Signal Transistors
The MMBT3906 (PNP, 40V / 200mA, SOT-23, 300MHz) and DSS5540X (PNP BJT, 40V / 4A, SOT-89) handle protection-circuit switching and gate-drive support. The TPHR8504PL N-channel MOSFET handles a secondary switching stage. Failures usually produce subtle symptoms (current limit tripping early, protection mis-triggering) rather than dead PSU.
Bitmain APW12 PSU Repair Components List
The table below lists every component LYS Shenzhen stocks for APW12 PSU repair. Each entry links directly to the corresponding part page — contact us at contact@lys-sz.com for bulk pricing or for complete APW12 PSU replacement units (APW121215, APW121417a, APW121417b variants).
| Part Number | Component Type | Typical Position / Role |
|---|---|---|
| NCP1253A | Current-mode PWM controller | 6-pin TSOP, 65kHz offline flyback |
| GBJ 2506 | Bridge rectifier | 25A / 600V single-phase input |
| ICE2QR4765 | Quasi-resonant PWM controller | 650V offline main switching engine |
| SCS210AM | SiC diode | 650V / 10A TO-220FM output rectification |
| 470µF 450V | Electrolytic capacitor | Primary DC bus bulk (35×50mm) |
| NCP1252 (8-pin) | Current-mode PWM controller | Forward / flyback applications, secondary stage |
| IX4340N (8-pin) | Gate driver | Dual low-side MOSFET driver, 8-pin SOIC |
| ZTL431BFTA | Voltage reference | Adjustable shunt 2.5V / 100mA, SOT-23-3 |
| SBT20L100CT | Schottky rectifier | 20A / 100V low-Vf, TO-220AB output stage |
| 1000µF 16V | Electrolytic capacitor | 10×12.5mm output bulk |
| TLP5772 | Optoisolator | Logic-output, push-pull, CMTI-rated, 6-SOP |
| MMBT3906 | PNP transistor | 40V / 200mA, SOT-23, 300MHz |
| K39N50W5 | N-channel MOSFET | TO-247, 38.8A / 600V primary switching |
| DSS5540X (-13) | PNP BJT | 40V / 4A, SOT-89, gate-drive support |
| PIC16F1704-I/SL | Microcontroller | 8-bit, 7KB Flash, host I²C and fault reporting |
| TPHR8504PL | N-channel MOSFET | 40V secondary switching |
The M6 Copper-Bar Bolt Check — Try This Before Opening the PSU
Like the Whatsminer P21 series, the Bitmain APW12 connects to the hashboards via M6 copper-bar bolts on the output side. The same mechanical failure mode applies: loose hashboard-side M6 bolts can present as a "dead PSU" complaint with PSU fan spinning and AC LED green, but 0V on the 12V busbars (or oscillating 0V↔12V as protection latches). Always run the M6 re-torque check before opening the APW12 case.
Re-torque procedure (same as other Bitmain/MicroBT PSUs)
- Kill AC at the breaker / PDU. Wait 60 seconds for bulk caps to discharge.
- Use a calibrated torque screwdriver in the 0.5-5 N-m range.
- Loosen each M6 bolt 1/8 turn first (resets the metal contact pressure), then re-torque to 3.0 N-m (spec range 2.5-3.5 N-m).
- Inspect lock washers (should be present per bolt), ring terminals (no cracked crimps or corrosion), bolt threads (clean, not stripped), and busbar contact surfaces (no blackening or bluing).
- If contact surface is blackened: polish with a brass brush (not steel) to bright copper, wipe with 99% IPA, apply a thin film of no-ox conductive grease (Noalox or equivalent) before re-torquing.
- Re-apply AC and verify the miner boots through its normal sequence.
- Schedule a re-torque calendar reminder for 6-12 months out as preventive maintenance.
Internal APW12 Diagnostic Workflow (When M6 Re-Torque Doesn't Fix It)
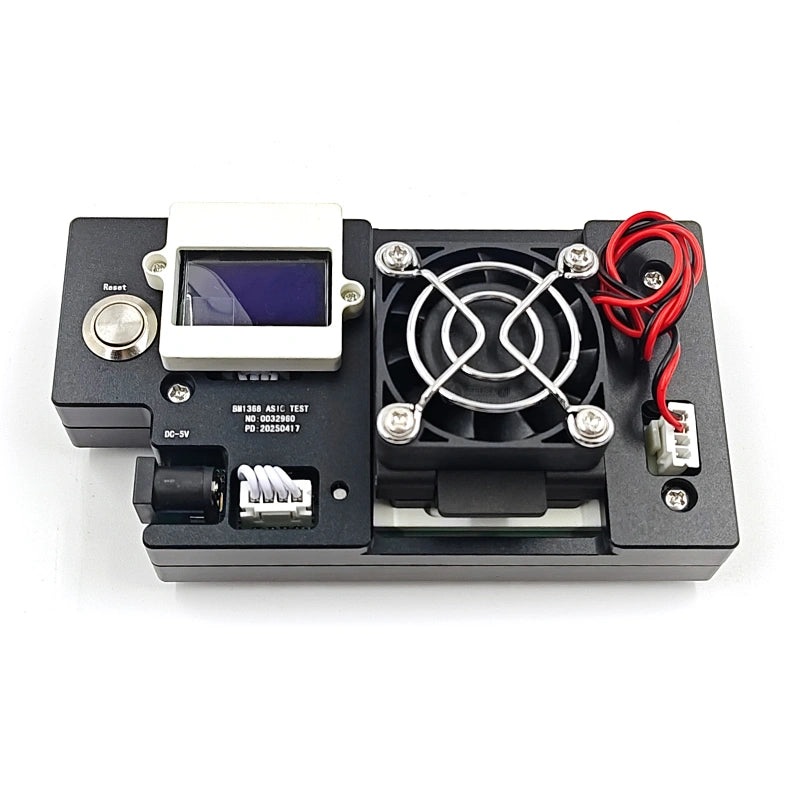
If the M6 bolt re-torque check is clean and the rail still won't come up, you have a genuine APW12 internal failure. The Antminer test procedure runs through four automated steps via the IIC interface on the Antminer communication test fixture; the diagnostic sequence below works whether or not you have the fixture available.
Step 1 — SB (standby) rail verification (always first)
After applying AC power, the first thing to confirm is the SB indicator light. The SB output is +12V ±5%. If the SB indicator illuminates, the PSU fan rotates, and the SB rail measures within ±5% of 12V, the auxiliary power supply circuit is healthy and you can proceed to Step 2. If the SB rail is dead, the fault is in the auxiliary stage — investigate (in order): AC fuse, SB control chip, SB primary MOSFET, SB secondary MOSFET, power supply diode.
Step 2 — Main rail activation via IIC interface
With the SB rail confirmed healthy, plug in the IIC interface start switch and press it to the "I" position. Verify the main output indicator illuminates and the main rail measures within 15V ±1% of the spec range (12-15V). If the main rail does not come up, the fault is one of: abnormal auxiliary power propagation, functional protection triggered, abnormal PFC operation (recall the dual-PFC requires simultaneous AC inputs), abnormal PWM control drive, damaged MCU or program error, damaged primary transistor, or damaged secondary transistor.
Step 3 — IIC communication verification
With SB and main rails healthy, verify IIC communication on the test fixture. Power on the fixture, connect the PSU's IIC interface, press the test switch. The fixture displays "PASS" if communication is healthy. If "FAIL" or no response: check the IIC cable and pin arrangement, verify the MCU program is correctly burned, then suspect a damaged MCU chip.
Step 4 — Manual diagnostic sequence
If the IIC test fixture is unavailable or any of the above steps fail in a way that doesn't isolate the cause, run the manual diagnostic:
- Disconnect AC and remove the PSU from the chassis. Wait 60 seconds for the bulk capacitor to discharge.
- Basic environmental checks first: AC input within 180-300V spec, load draw within rated capacity, fan operational, no dust accumulation in internal airflow.
- External visual inspection — check the case for overheating discolouration, deformation, burning smells, or scorched silicon visible through ventilation slots.
- Open the case — remove the 6 housing screws and the 6 PCB screws; disconnect the fan socket cable first before separating the PCB.
- DIP component visual inspection — look at primary transistors, high-voltage capacitors, transformers, fuses, bridge rectifiers, film capacitors, and sense resistors for obvious signs of burning, cracking, or arcing.
- SMD component visual inspection — check both component side and solder side for burnt parts, arcing marks, or burnt-and-broken copper traces.
- Diode-mode test of every primary MOSFET and bridge rectifier — set DMM to diode mode. A healthy semiconductor shows 0.3-0.6V drop in the forward direction (low-voltage MOSFETs may show ~0.1V drop). Outside that range = replace.
- MOSFET gate resistance test — set DMM to resistance mode. Black probe to ground, red probe to the MOSFET gate (G) terminal. The resistance should not be less than 1KΩ. Anything below 1KΩ indicates a failed MOSFET.
- Output rectifier check — test SBT20L100CT and SCS210AM in diode mode. Open or short = replace.
- Voltage reference check — measure the ZTL431BFTA output (should track 2.5V) before chasing PWM controller issues.
- PWM controller VCC verification — verify the ICE2QR4765, NCP1252, and NCP1253A all have correct VCC. Apply AC and allow the auxiliary stage to come up first — the auxiliary VCC then powers the other controllers. Caution: high-voltage components present, non-professionals should not attempt powered measurements.
- Component replacement — use a constant-temperature soldering iron at 380±10°C for normal components (max 3-second pin dwell time) and 400±10°C for components with heatsinks. Critical steps: (a) clean off any silicone sealant from the failed component first using a scraping tool; (b) desolder all pins fully before extracting; (c) never force-pull component pins before solder is completely removed (this breaks copper traces and damages PCB vias). After replacement, inspect surrounding SMD components for collateral damage and clean flux residue.
- Function test on the Antminer communication test fixture — re-run Steps 1-3 above. The fixture displays "OK" then "Step 2 OK" sequentially through the 4 automated steps; all 4 OK confirms successful repair.
- Reassembly — verify the MYLAR insulation sheet inside the case is intact (missing or damaged MYLAR creates a high-voltage isolation hazard); install the PCB with all 6 screws; reconnect the fan socket cable before closing the case cover.
- 15-minute full-load soak test before discharging the unit from the bench (electronic load or known-good miner chassis).
APW12 Error Codes Linked to PSU Issues
The Antminer firmware exposes specific error codes that point to PSU faults. If the miner reports any of the following, prioritise PSU inspection over hashboard diagnostics:
- "PSU communication failed" / "PSU not detected" — usually the PIC16F1704 or TLP5772 isolator on the APW12. Check the I²C signalling path between the PSU and control board.
- "PSU output voltage out of range" — degraded ZTL431BFTA voltage reference or failed output capacitors. Verify the actual rail voltage with a multimeter at the busbar before chasing software issues.
- "PSU temperature too high" — verify fan operation, check for dust accumulation in the internal airflow path. The PSU enters a protection lock state when internal temperature exceeds spec.
- "PSU overload" — the miner is drawing more current than the PSU is rated to deliver. Verify the hashboard tune is within the PSU's rated capacity; check for shorted output stage on the hashboard side.
Required Repair Tools & Consumables
- Calibrated torque screwdriver, 0.5-5 N-m range — mandatory for M6 copper-bar bolt re-torque procedure.
- Antminer communication test fixture with I²C / IIC interface — for the 4-step automated function test after repair.
- Electronic load (CC mode capable, ≥1500W) — for post-repair verification under realistic load. A known-good miner chassis can substitute.
- Multimeter (Fluke 15B+ or equivalent) with welded steel probe needles.
- IR thermal camera for busbar joint hot-spot detection under load.
- Constant-temperature soldering iron rated for 350-380°C.
- Desoldering tool (Pro'sKit SS-331 or equivalent).
- Anti-static workbench with grounding + ESD wrist strap.
- Solder paste M705 grade, no-clean flux, board washing fluid with anhydrous alcohol.
- Brass brush + 99% isopropyl alcohol + Noalox conductive grease for cleaning blackened busbar contacts.
- Common spare 0402 resistors (0R, 33Ω, 51R, 10K) and 0402 capacitors (0.1µF, 1µF).
- Silicone-sealant removal tool (the failed components are often potted in silicone for vibration resistance — must be scraped clean before desoldering).
When Chip-Level Repair Makes More Sense Than Replacement
A new APW12 PSU runs significantly more than the components needed for chip-level repair. For repair shops processing more than a few APW12 units a month, a small inventory of the high-voltage MOSFETs (K39N50W5, TPHR8504PL), the output rectifiers (SCS210AM, SBT20L100CT), the ICE2QR4765 controller, the NCP1252/NCP1253A PWM controllers, the TLP5772 optoisolator, the PIC16F1704 microcontroller, and the bulk capacitors covers the majority of bench-repair scenarios.
Stop DIY when there is visible cascade damage — scorched primary MOSFETs, blued copper at a busbar, swollen capacitor tops on the PSU board, or burn marks on the silkscreen. Replacing only the visibly-broken part leaves adjacent damaged-but-not-yet-failed silicon vulnerable to the next event.
FAQ — Bitmain APW12 PSU Repair
Which Antminer models use the APW12 PSU?
The APW12 series powers the entire Antminer S19 generation: S19, S19 Pro, S19a, S19a Pro, S19j, S19j Pro, S19j Pro+, S19j Pro Hydro, S19k Pro, S19 XP (earlier production), and S19 Hydro variants. The APW12 family includes sub-variants APW121215 / APW121215a (12-15V output) and APW121417a / APW121417b (14-17V output) tuned to specific miner generations and hashrate bins.
My APW12 shows AC LED green and fan spinning but the miner won't boot. Is the PSU dead?
Often this is loose M6 copper-bar bolts on the hashboard-side output, not a dead PSU. Run the M6 bolt re-torque procedure to 3.0 N-m (spec range 2.5-3.5 N-m) before opening the PSU case. The same failure mode that affects the Whatsminer P21 also affects Bitmain APW-class PSUs because both use identical M6 copper-bar output topology.
What topology does the APW12 use?
The APW12 is a quasi-resonant flyback switching supply with digital monitoring. The primary stage uses the ICE2QR4765 quasi-resonant 650V controller, secondary PWM is handled by NCP1252 (8-pin DIP forward/flyback) and NCP1253A (6-pin TSOP flyback). This is a different topology from the LLC resonant half-bridge used in the newer APW17 and the Whatsminer P21 series.
How do I test the APW12 after repair?
Connect the repaired APW12 to the Antminer communication test fixture via the I²C / IIC interface. The fixture runs 4 automated test steps; "OK" on all 4 confirms successful repair. Without the official test fixture, an electronic load in CC mode (or a known-good miner chassis) plus a multimeter for output voltage / ripple verification can substitute for verification.
Why does the APW12 use a PIC16F1704 — same as Antminer hashboards?
The PIC16F1704 is Bitmain's standard 8-bit microcontroller across multiple miner subsystems — hashboards, control boards, and PSUs. Using the same MCU family simplifies repair-bench inventory: one PIC chip stock covers hashboard, control board, and PSU repair needs across the S19 lineup.
Sourcing APW12 PSU Repair Parts
LYS Shenzhen stocks every component listed above for the Bitmain APW12 PSU. For calibrated torque screwdrivers, complete APW12 PSU replacement units (APW121215, APW121417a, APW121417b variants), or for bulk farm-scale orders, contact our team at contact@lys-sz.com — we operate an on-demand sourcing channel for repair components across the full Antminer PSU lineup including APW7, APW8, APW9, APW9+, APW11, and the newer APW17 series.
Worldwide shipping from our Shenzhen warehouse via DHL, FedEx, UPS, and sea freight. DDP shipping available for US and EU customers; case-by-case for other lanes — request a quote with your shipping country for confirmation.